OK, so you're pawing the ground and snorting like a bull over some hot model you saw online. Nope, not two legs - wings instead. Yup, you're a modeler and you got a case of the *I want me a new model airplane* disease . . . you have it really bad, too!
Like you go to sleep and dream about it. You wake up and brush your teeth whilst daydreaming about the hot model. Yup, you got hot model on the brain! So your next move is to begin leaving model magazines like Model Airplane News and Model Aviation open on the couch to the reviews. And leaving browser tabs open on the computer so you can get a quick fix by wiggling the mouse.
Feeling a touch guilty, you wander into the workshop and cast your eyes about. Reaching for your favorite model (what *was* your favorite), you wipe it down tenderly with a paper towel, the dust showing a touch of neglect, but nothing. You're just not feeling it - not anymore - sigh.
So you swallow hard and steel yourself for, *the conversation*, a prayer meeting with the spice-of-your-life, your better half. Of course, she's not blind and has seen it before. Means she knows the signs and lucky you, she smiles tolerantly and make it easy on you. After all, she knows you work hard and playing hard is the flip side of that coin! So the ways are greased, and you eagerly whip out the plastic. You place your order and the die is cast.

Now begins the interminable countdown. Waiting for online tracking to show the package actually moving. So you impatiently await the brown truck! Your mood's a bit glum until finally, the clouds part, the sun shines (you possibly hear trumpets in the background) because it's BT-day as you hear the brown truck pulling up.
Not wanting to appear too eager, you amble out all nonchalant-like and perceive him rustling around in the back of the truck. Then he plops a giant box onto the ground and holds out the tablet for your digital signature. Nope, not just yet! After all, you're no virgin, you know the drill.
First order of business is to look the exterior over carefully - like make sure nobody put a fork lift tine through the side. That's your only chance to raise an objection - before you sign - because after that, as far as shipping is concerned, it's not their problem. But everything looks good and you scrawl your John Hancock with a flourish. Then with a smile and a touch of his cap, the BT-guy roars off!
Wrestling the large box into the workshop, you pause a moment, bit heavier than you thought. Box knife in hand, you eagerly set-to opening 'er up! And as you begin pulling components out, a slight smile of anticipation on your lips, it's all you can do to not break out in song like a 1940s cowboy movie character!
You've read about the model, seen it on YouTube, but this is the moment you lay eyes on it in person. First out of the box, an individual wing panel within a clear plastic bag. No, this is not a small model, so instead of both wing halves, these are packed separately. You note, absently, the wing tube is nowhere to be seen, but you're not worried.
The magazine advertising said iron-on covering, and as you slit the tape and pull the first wing panel out of the plastic bag, you notice it. Argh! The rat bastards cheaped out and used pocket rails for the aileron servos installation instead of mounting plates. Your last model was a Hangar 9, so you know how some manufacturers do things . . . aww crap!
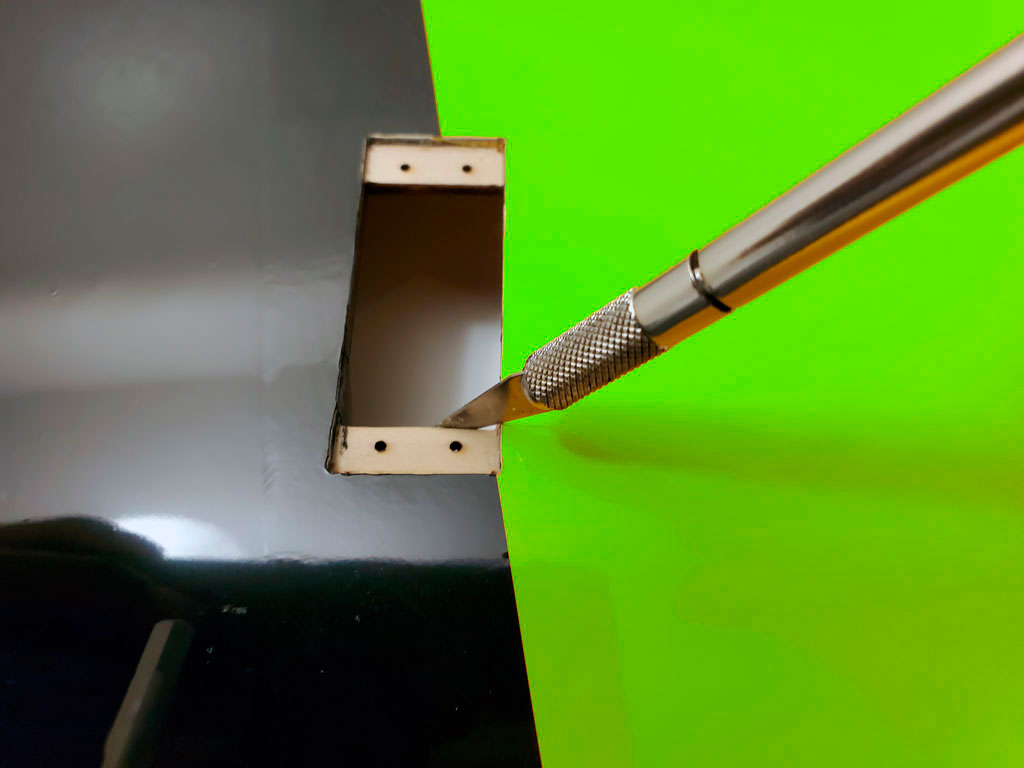
- A sign of cost saving measures in manufacturing - a #11 blade cleans up the edge
Relocating the throttle servo from the motor box to CG
Next, you eyeball the fuselage, and you judge it looks good. Maybe you'll add a touch of epoxy around the joint where the firewall meets the fuselage sides, but overall, not too bad. Nice wood selection, too.
Oh-oh, they expect you to mount the throttle servo on the motor box, ugh! You know better than this, you think to yourself. Engine vibration will surely kill this servo deader than a door nail - usually when it's least convenient and you're not expecting it.
A cost savings measure many model manufacturers have adopted sees the throttle servo mounted on the engine box. Bad idea because what's good for their bottom line isn't so good for you.
Supplying a 1/16" music wire pushrod is cheap *but* steel transmits too much engine vibration to the potentiometer coming off the engine. Remember how your pal Mickey was stuck flying out nearly a full a tank of gas at 1/3 throttle when the throttle servo crapped out?
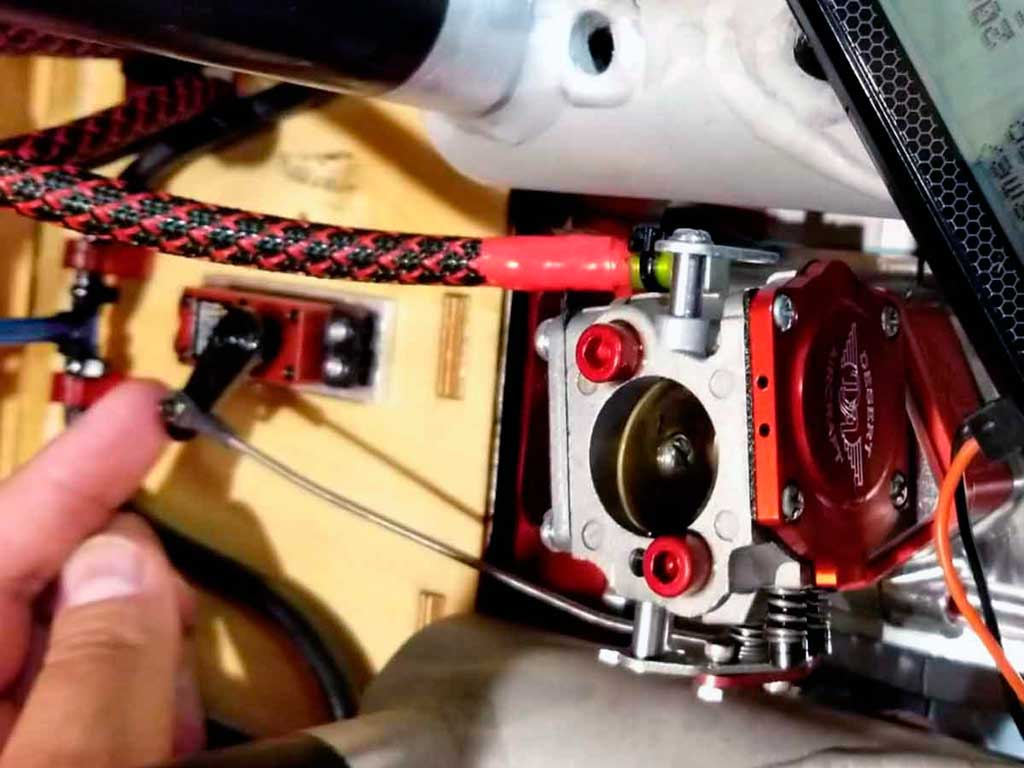
- Short steel pushrod - about as bad as it gets on a servo because it transmits engine vibration
Of course, that was Mickey's own fault because you *told* him mounting a servo to the engine box was dumb. He quipped how some big-time sponsored pilot at Joe Nall had the cowl off and he'd spotted his throttle servo mounted on his model's motor box. You bit your lip, and shook your head thinking, eventually he'll learn.
You also warned him against depending on only the throttle servo to shut the engine off in an emergency. Told him this was dumb. Of course, after the fuel ran out and he landed the model wasn't the time to remind him about how an auxiliary kill switch would have let him control when he landed, but you were tempted.
So flying out the tank at 1/3 throttle, model barely above stall speed was Mickey's learning experience because some folks learn from others, some folks have to butt their head up against the problem for themselves. But it was a nerve wracking experience - remember the look on his face when you opened the dead throttle servo?
You'd never seen a better example of why not to mount the throttle servo next to a paint shaker than this. Flecks of metal from the gears vibrating against each other suspended in the grease and glimmering softly indicative of premature gear wear.
Of course this would a bad moment to reminded him a gasoline-ignition engine should also have an electronic kill switch. And if you had, knowing the know it all he could be, he have acted like he hadn't heard you.
Anyway, you weren't surprised at what you found inside that servo. You even snapped a picture of the poor things guts.
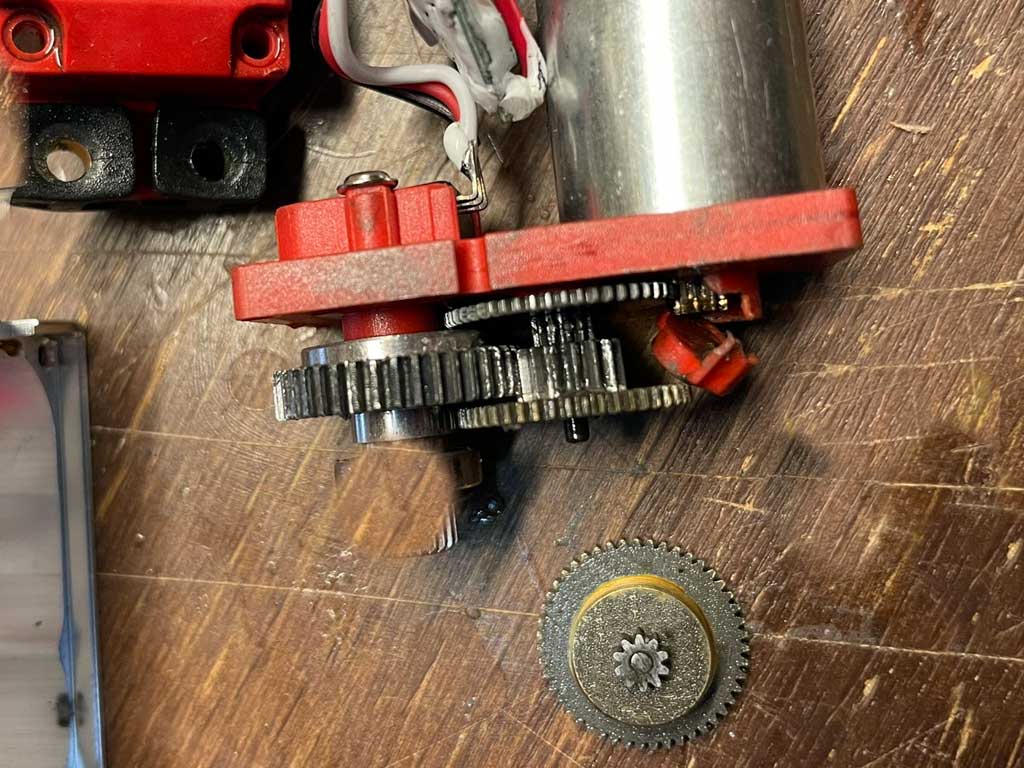
- A sad end for a fine servo, grease embedded with metal flecks of gear dust coating the inside!
Basically, gears covered in metal dust mixed into grease, even a bit of case plastic broken off as the servo's innards had basically self-destructed due to the 85cc paint-mixer vibrating away six inches away. But you'd warned him about this - it wasn't your first rodeo. And for your new model, as an experienced hand, it definitely means you're not mounting the throttle servo on the engine box!
The solution is easy enough. Just get a Sullivan red Gold-N-Rod at the hobby shop to make up your own Bowden cable for throttle control. Hmmm, 'Where was I just reading about this?'
Gasser throttle servo problems & solutions
Note: and if you insist on exposing the throttle servo to the engine heat and vibration, at least be sure not to overtighten the servo mounting screws by compressing the rubber isolation mounts *and* instead of the steel pushrod, substitute a short piece of the inner yellow of a Gold-N-Rod because when it's really short, it's plenty stiff.
Do whatever you can to keep vibration from reaching the potentiometer as that's usually what fails first in the Hellish environment beneath the cowl.
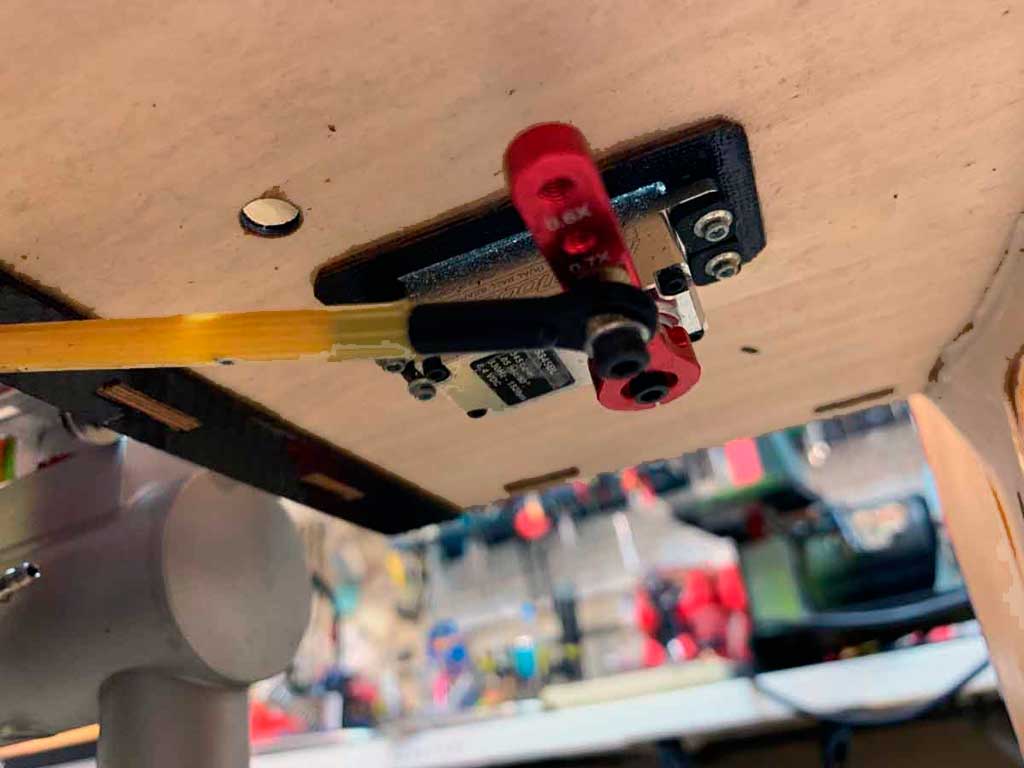
- Better than a 1/16" steel pushrod - this setup uses a short piece of inner Gold-N-Rod, instead
However, if you note what uber experienced modelers do, they know an even better location for the throttle servo is a few feet away from the engine. Mounting it near the CG results in a more reliable servo because it's better isolated from the engine's vibration.
Just make up a mount of scrap 1/8" aircraft plywood and epoxy it to the side of the fuselage somewhere back toward the CG of the model. Within the fuselage (near the wing tube) is nice because there's plenty of excess space!
And this method works with twins, too - like in the photo below. Within this nacel, the savvy modeler eschewed mounting the servo near the engine and on the box and instead, used a Gold-N-Rod to mount the servo. It's as far away from the heat and vibration as he could get it.
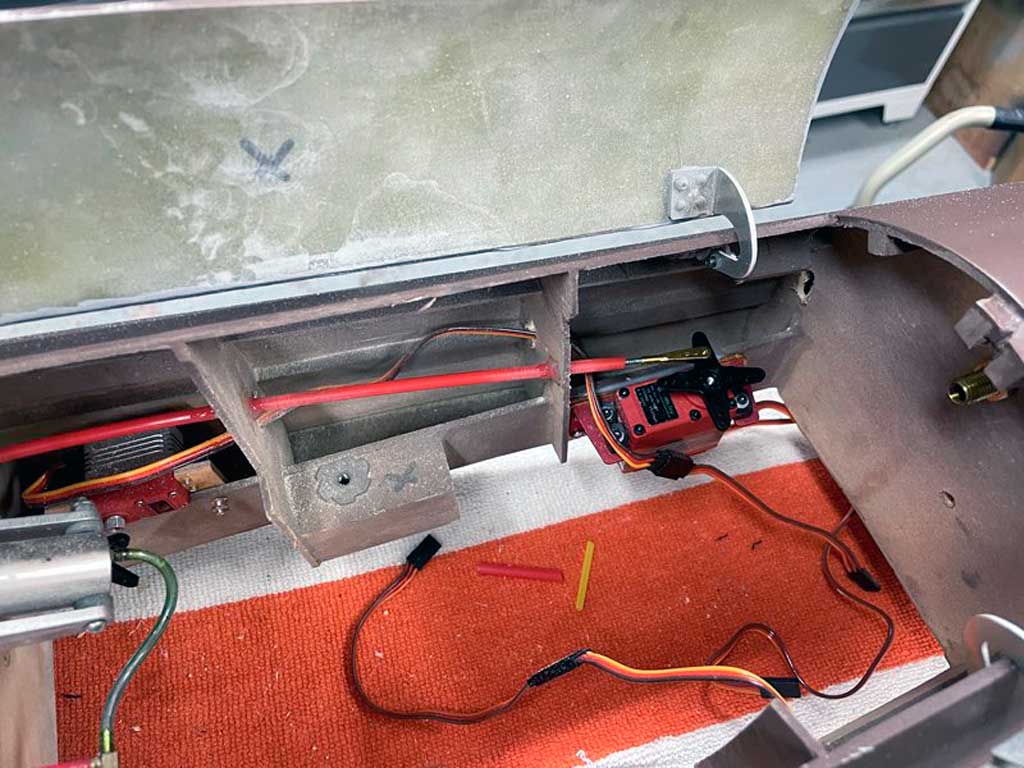
- Engine nacel mounted throttle servo - this savvy builder placed it a foot behind the engine!
Relocating the rudder servo forward from the tail to the CG
So next you turn your attention to the rudder servo. If you relocate this servo into the fuselage and place it near the CG, the model will handle just a little better when it tumbles. After all, every gram moved from the tail offsets 3-4g at the nose. It's simple physics!
Only thing is, 'Hmmm!', you mutter under your breath, 'Can I match this particular color of film covering?' There may be a trip to the hobby shop in the near future to see.

OK, so where's the build manual? Maybe the manual says what colors are used to finish the model! After all, some of these high end model manufacturers - like Extreme Flight and Hangar 9 - use genuine UltraCoat instead of that bullshit, 'Premium Heat Shrink Covering!' And if they're really on the ball, they'll *tell* you which UltraCoat color codes were used in the mannual. Hmmm, the manual doesn't say - sigh.
OK, that'll wait, so next you turn your attention to the hardware package. Wing tube first, it looks nice. Better than nice, decent! Setting it aside gently you wonder, 'What else?', as you mutter under your breath.
Hardware looks decent, too. Balls links look OK, too. No, maybe not Dubro-quality but not junk, either. Hmmm, those included servo arms you bolt to plastic wheels? Nope, gonna use something better . . . for sure
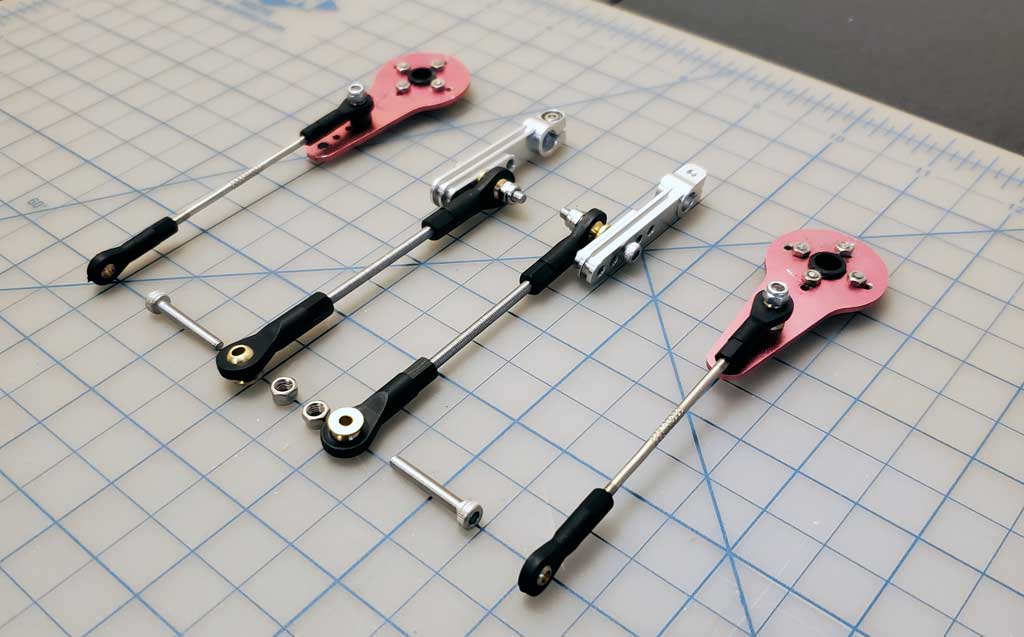
- ProModeler PDRS35-25T - CNC-machined of 7075-T6 alloy - these are 1-1/2" long
Dry fitting the model
Next, let's dry fit the model. Set the fuselage on the workbench, slip the wing tube in place. Slide on the wing panels. Hmmm, where's my DA-70?
Definitely gonna need to figure out where to mount the smoke tank. And also make sure the cowl clears the cylinders. Dumping straight into the mufflers, and directly opposite the hot flow of the exhaust, means those Bad Dog nozzles will make a pile of smoke!
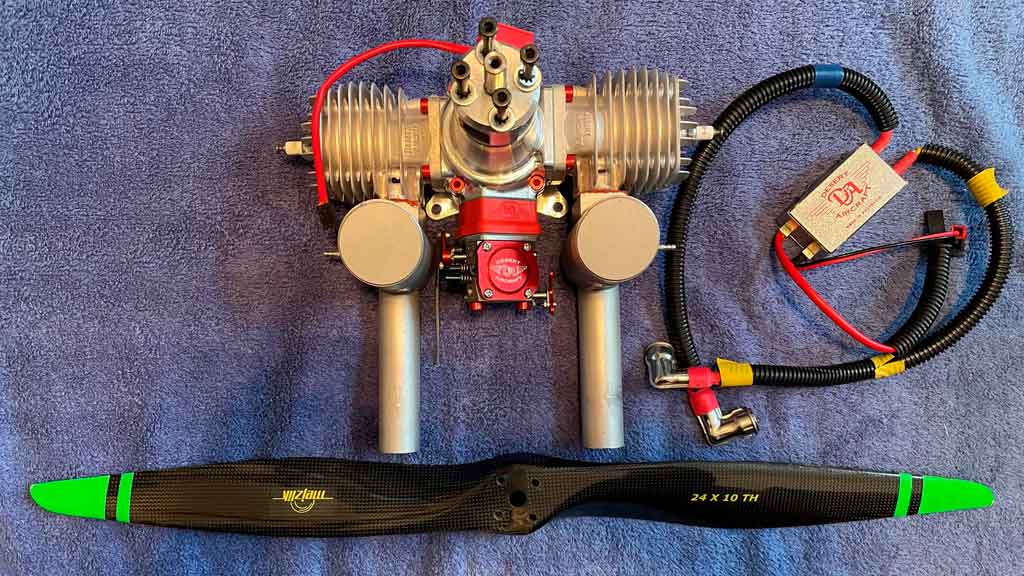
- DA-70, Mejzlik 24x10TH, Bad Dog nozzles - the propulsion end has got to be up to snuff!
Upping your game - so far
So you've looked your new model over and overall you're pleased. Rarely is anything perfect and this model is no exception. You've seen a few places you're going to put your personal touch on it. You know, like bring it up to your *own* quality standards.
For example, the wings use what are called a drop-pocket servo installation within the wing panels. You'll probably just suck it up and live with it because you want to fly but it's aggravating to see a shortcut like this in an expensive model Especially when the manufacturers can do it right for maybe an extra 2 bucks per model.
This is what a plate-style pocket installation looks like.
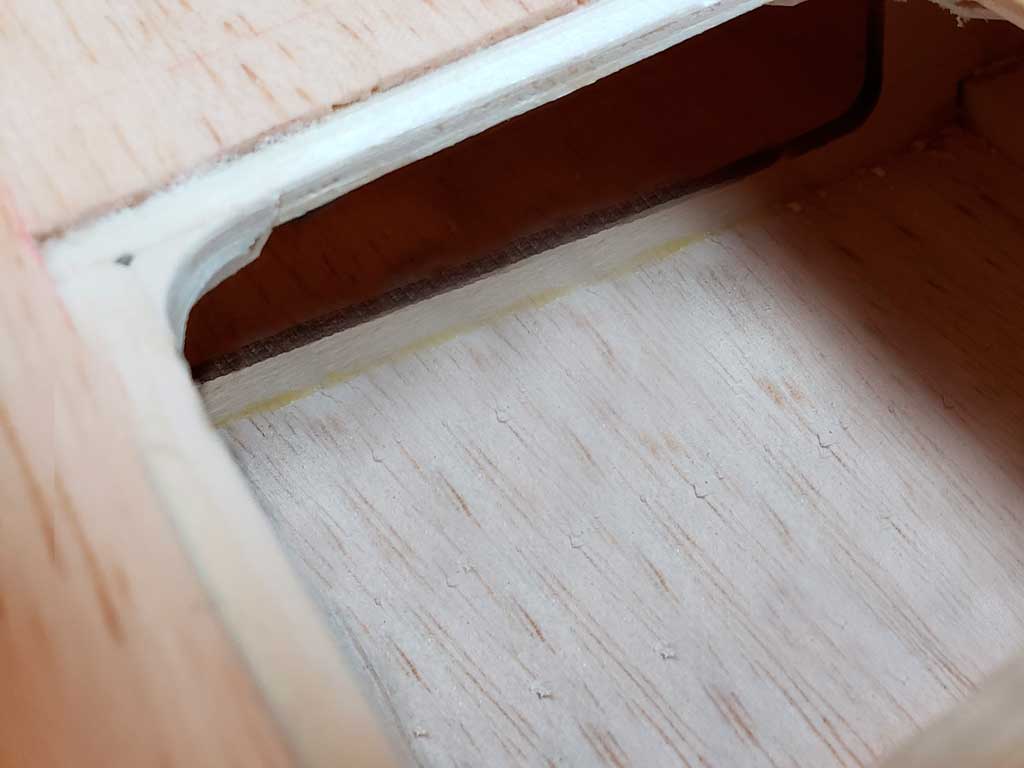
- Easy to fit between wing ribs, use 1/4" wide strips of 1/16" plywood to make a lip
Servo Extensions
So next in assembling the wing panels you'll snake an extension through with the aid of a string, which the manufacturer thoughtfully left in place. This, before you drop the servos into place to be secured with four screws and calling it done.
One thing for sure it you'll either use locking extensions or non-locking with a bit of dental floss or heat shrink to secure the joint. Both are readily available. When it comes to the extensions themselves, there are a couple of must haves.
Silicone insulation with high strand count 20AWG copper leads. This is the best because it resists damage from vibration over time. Also, if you're using an ignition engine, then you definitely want twisted leads because they resist stray RFI. This feature alone may save your model one day if the ignition module's ground begins to fail. Most important of all, however is the 20AWG thickness.
Learn more about leads and voltage loss with this article; Servo Leads & Extensions
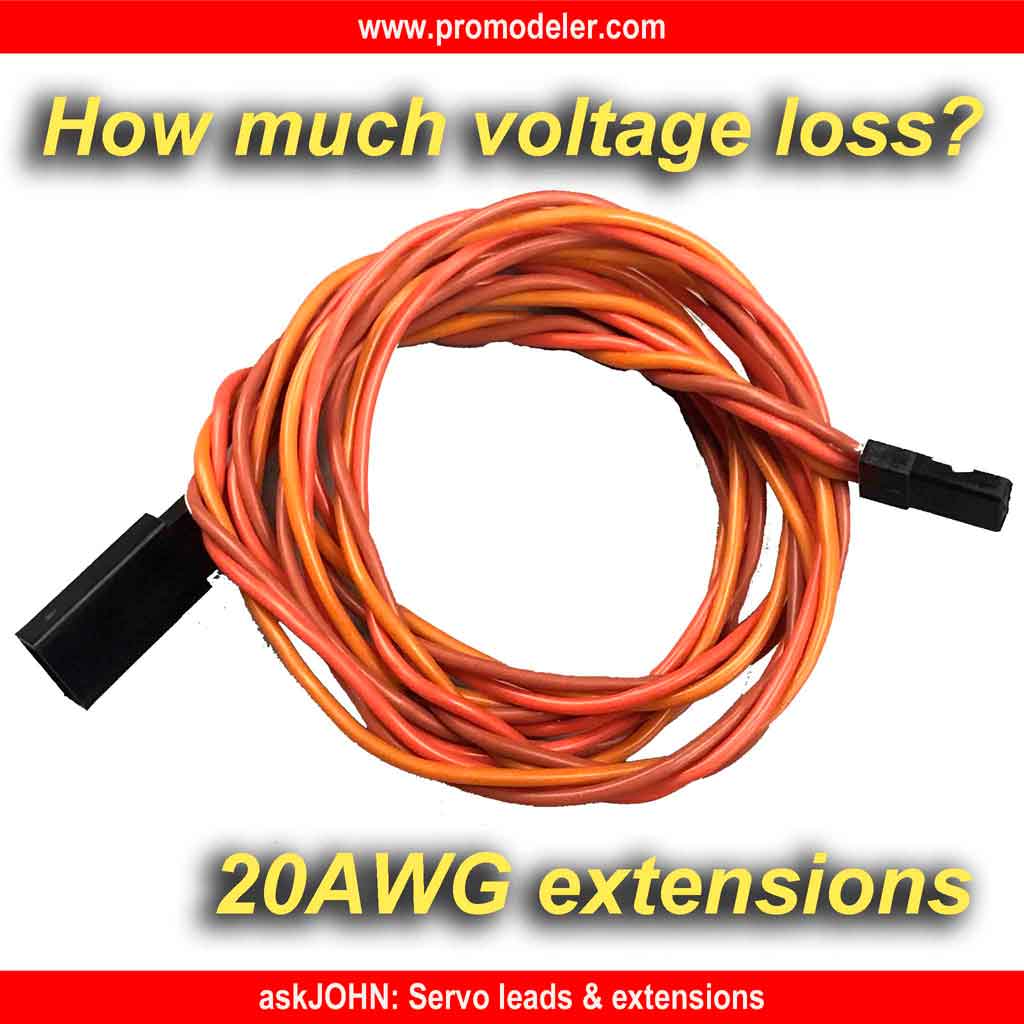
So remember this about extension, the higher the number, the thinner the gauge wire. You want the thicker wire because it reduces voltage loss. And twisted leads resist interference better. Getting extensions with both twisted leads and 20AWG, and especially when it has a silicone insulation, is about as good as it gets in terms of extensions!
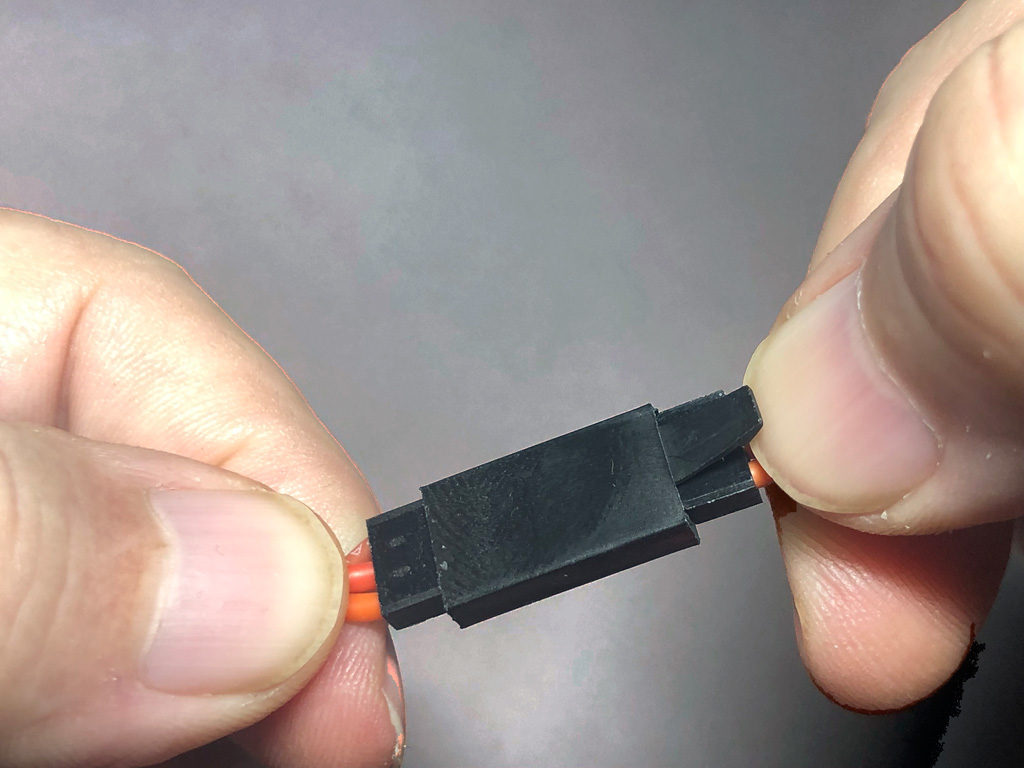
- A thumbnail is all it takes to release the locking tab
Circling back to aileron servo mounts
Yeah, it's aggravating the aren't using a side-plate mounts for the aileron servo like better quality models which have the servo output shaft rotation parallel to the hinge line, but it is what it is. Maybe after you see how it flies, this can be a winter project, building in plate-mount between the wing ribs. They're easy enough to do and if you find the matching covering are a nice bit of customization for the model.
- 1/16" aircraft ply and a hatch is born - add 1/2"x3/4" maple blocks, plus a slot, and presto!
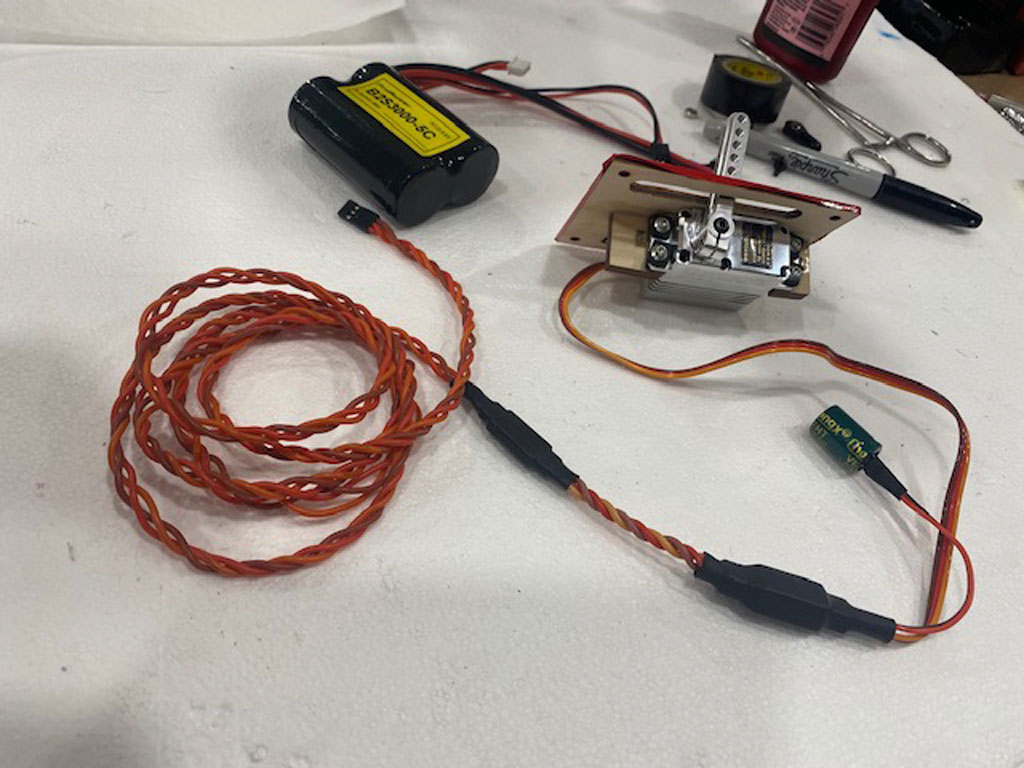
Added capacitance whenever extensions exceed 24" in length
Note in the above photo how that savvy model used a capacitor at the load end. The trade name is the stupid sounding Glitch Buster but using them is smart business.
Along with a Y-harness, which is how you physically join the servo, the cap, and the extension, the basic reason for these things is to boosts the juice at the servo under load. This is especially important when the servo changes direction and when struggling under big forces.
Think of the capacitor, basically a reservoir of current, as serving the same function as a spotter at the gym. When you're pressing weights, the spotter is there to help same as the capacitor, the helper of last resort.

Both caps and Y-harnesses are available in hobby shops, or direct from us.They add negligible mass to a model and may help you. Instructions on the ProModeler website explain how to make your own if you're so inclined because selling these isn't a matter of money but of best practices, which boils down to better safety.
Wrapping up the wing-servo installation
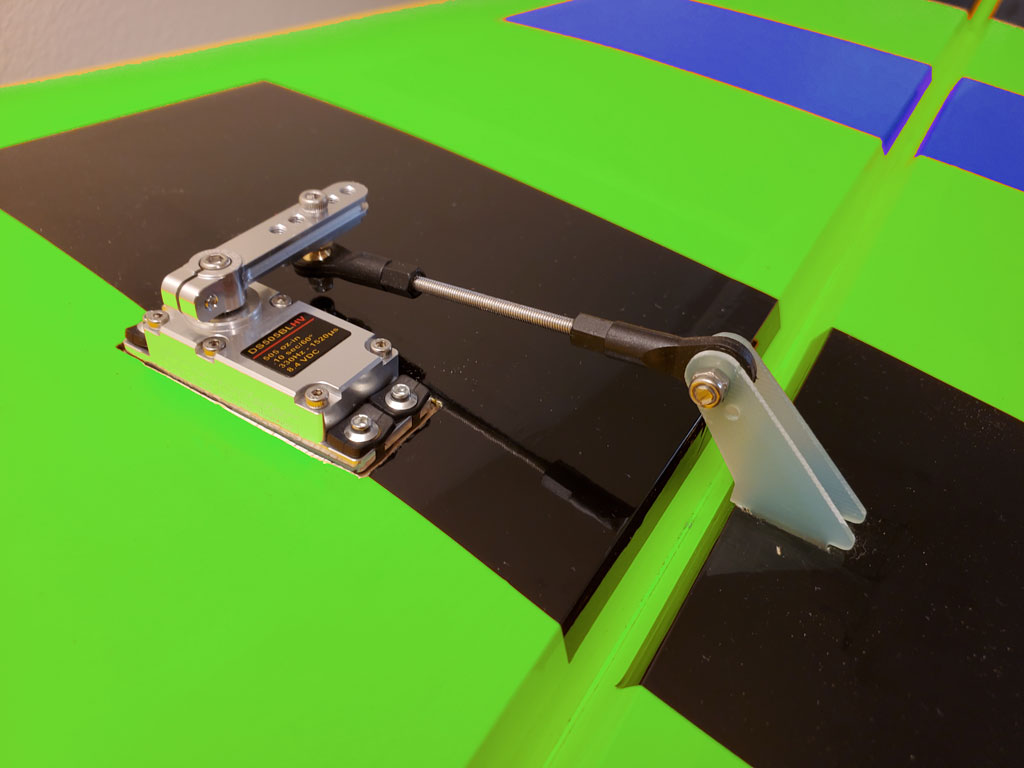
The big advantage of the plate-type mount is the servo arm moves in the same plane of rotation as the control surface. Nothing *really* wrong with the pocket-type except the linkage swings wide as it travels.
'Crap!', you mumble under your breath before emitting a sigh. Sure would be nice, though, to have this instead, eh?

- Hangar 9 use plate-type mounts for aileron - a clean look *and* perfect axis of rotation
Honestly, there is one benefit of the pocket-type wing servo installation. It leaves the servo and linkage exposed to the eye. In fact, it shows off rather nicely your good taste in servos!
- Pocket-type installs aren't all bad . . . they're good for showcasing your servos!
Benefits of relocating throttle and rudder servos to the CG
We glossed over the *why* for relocating the rudder servo. Sure, moving the throttle servo makes perfect sense as the heat and vibration are destructive.
And while a adding a Bowden cable throttle linkage installations is easy enough, when the bulk buyer leaves it to the model manufacturer, then they for sure will opt for the cheapest and most simple way of doing the job, e.g. mounting the throttle servo on the engine box and supplying a short piece of 1/16" wire to make the hook up.
But just because the bulk-buyer doesn't gives a hoot, doesn't mean an experienced modeler won't shift for himself and buy a high quality aftermarket Bowden cable and relocate the throttle servo back near the CG, instead.
Why? Several reasons, one to do with reduced RFI possibilities because the thottle servo lead is a direct path back to the receiver by acting as an antenna for the ignition module when the insulation breaks down and begins broadcasting noise.
But a nice (albeit tiny) benefit of mounting the throttle servo near the CG is this optimizes aerobatic performance. This is about reducing the dumbbell effect.But it's much more important for the rudder servo.
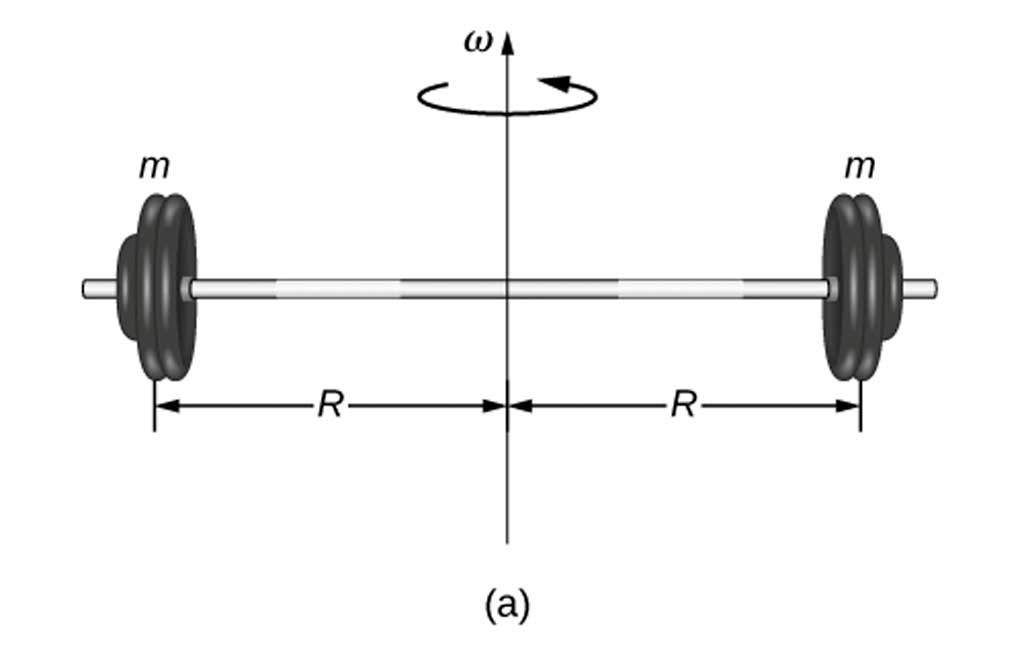
- Equipment affects moment -on CG is best - every 1g at the tail is worth 3-4g at the nose
To what extremes can you go when relocating the servos? There's nothing better than mounting *all* the servos on the CG itself. This is what's found in the highest quality products.
For example, you'll find this kind of attention to detail in the top notch models from the likes of CARF. There's a reason some folks are willing to pay through the nose for those models, and servo location is the perfect example of where top quality shows.
We're speaking of the best of the best like CARF's really, really large 3 meter Extra 300LX. And when you pony up in the neighborhood of $4000, before engine and avionics, you expect top notch quality. best of the best. And guess what? Every effort has been expended to mount the avionics components, the servos, neared to the aircraft's CG (center of gravity).
Remember, it's all about reducing the dumbbell effect so the model flips and tumbles better.
- Knife edge flight really strains the rudder servo - you don't want slack in the pull-pull cables
In this example of the bests amongst ARFs, note how much trouble CARF went to to mount the servos near the CG on one of their most expensive aircraft. Note below relationship of servos to wing tube - they are basically at the CG.
Yup, the CARF-guys go to a LOT of trouble to mount avionics at the CG. Sure, some folks with a dog in the hunt say it doesn't matter but riddle me this, if you wrap three servos with electrical tape onto a 1/4" dowel. Make a bundle.
Now hold the bundle of servos in your hand and wave the tip of the dowel around. Pretty easy to whip it like a Three Muskateer's double-wide epee blade, right? Now reverse the dowel, hold the wooden end by itself tightly, and wave the servos around 3-feet away in space? Now you're feeling the dumbbell effect. Big model, they're even further away than on a 3' dowel. Starting to understand how important it is to place avionics near the CG?
Major point is, servos at the CG on a model like a P-51 don't matter too much. But on a model that is created to flip and tumble as you perform your XA routine? This is much easier when any avionics are relocate neared the the CG like in this CARF Extra 300LX.
But it doesn't take big money, and every little bit helps.

- Motion transfer relies on CF-pushrods and bearing-equipped linkages to reduce drag
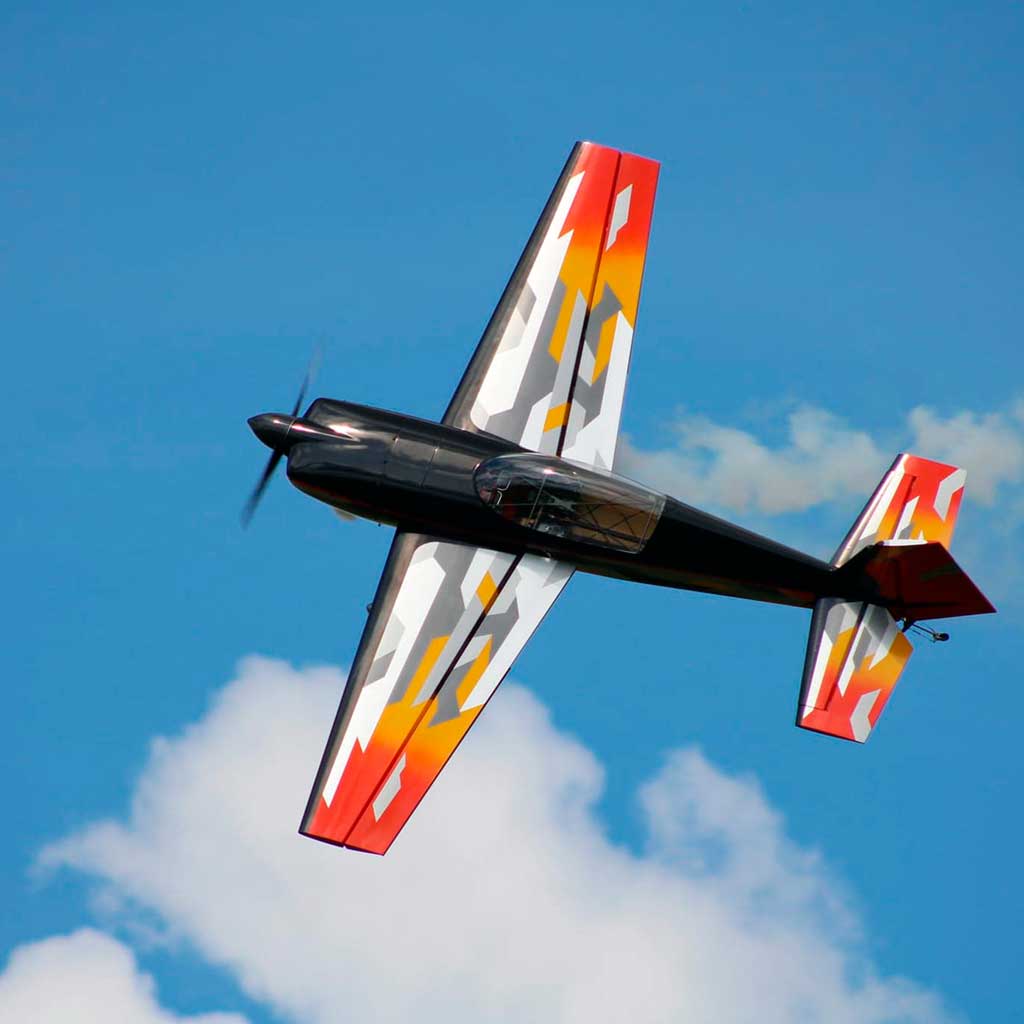
For example, having the rudder servo near the CG is standard in other high quality model, like the ARFs from Extreme Flight.
Eyeball this 91in Extra 300 V2 equipped with pull-pull cables/hardware/installation where straight out of the box, this model has the rudder servo close to the CG . . . why? Expressly to reduce moment - the dumbbell effect.
These guys - the designers at Extreme Flight - they know what they're doing, also! And at a far more popular price point. But if the model you buy has the rudder servo under the stab, relocating it is easy enough with a bit of scrap 1/8" plywood. make your own mount and mount it near the CG and use pull-pull cables.
Folks, this isn't rocket science!

- Rudder servo near the CG and for the best control, a pulley instead of a tiller arm
So the rudder servo on better models is mounted near the CG versus an el cheapo build where the rudder-servo is mounted beneath the stab. Also means instead of a short steel pushrod to actuate the rudder surface, you're going to use a high quality cables setup with top grade hardware.
Yes, the good stuff cost a few bucks more - but - most manufacturers cheap out at this point because a) novices don't know any better, and b) experienced pilots have existing preferences.
Speaking of quality touches, note how this EF-model uses a tube to make routing leads to the elevator servos easier. Nothing says quality more than a designer who cares about the small stuff.
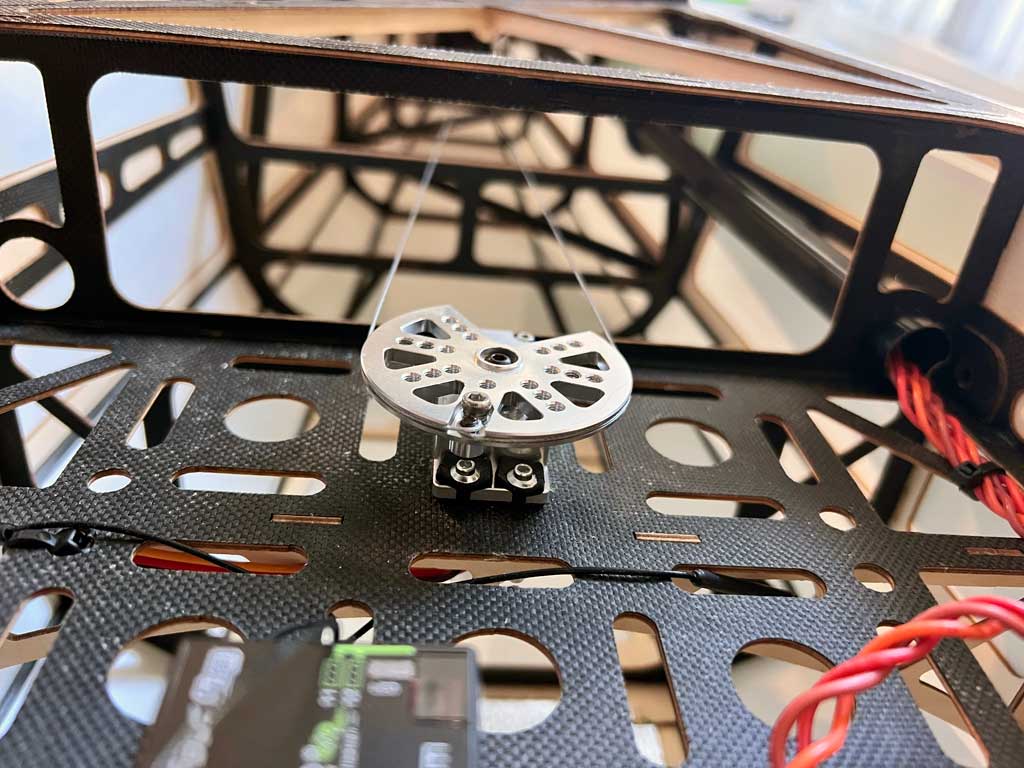
- A ProModeler DS630BLHV plus a PDRS50PP-25T pulley for the pull-pull rudder installation
Of course, detail-oriented modelers will note how the Extreme Flight models routed the extensions down the fuselage via a carbon fiber tube. However, even folks who buy an el cheapo model may elect to relocate certain components - like servos. And adding a pultruded carbon tube, or even one made by rolling up brown paper will do.
And relocating a rudder servo to better suit their own tastes/expectations of quality is super easy because models are largely made of balsa and ply. Thus, this just involve basic modeling skills to modify.
Note the ProModeler PDRS50PP-25T continuous closed-loop pulley for rudder control. The chief benefit of a pulley is the downwind cable doesn't go slack like when you use tillers. This may not matter so much with a sport model, but when the a precision model bounces due to turbulence, it definitely matters!
When using cables, this is why pulleys exist!
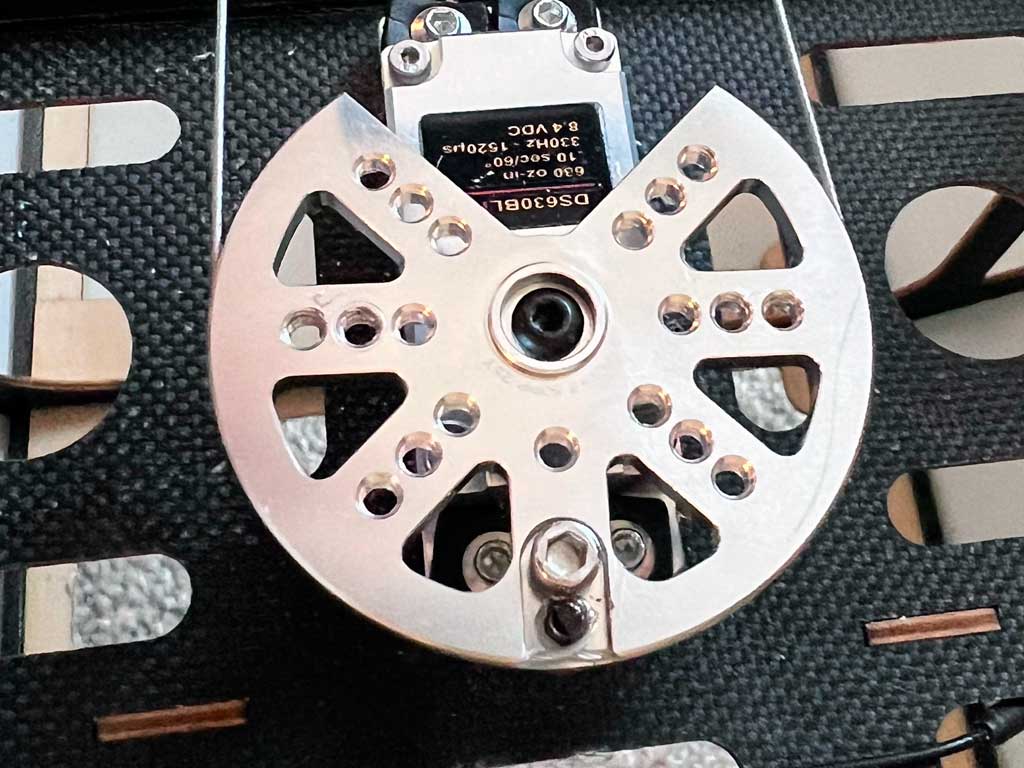
- A PDRS34PP-25T for 60-78" models, while larger models use a PDRS50PP-25T pull-pull.
Bottom line? Details count and if this stuff matters to you, then do what you need to to modify the aircraft to suit your tastes. Maybe rookies build the model as the instructions say, but pros actually have a clue of what they're missing. Rookies? They'll learn.
So as an experienced modeler, you readily discern what's missing in a sub-par economy ARF. Basically, all of the good stuff is missing. No shame in your budget forcing you to roll your own. A modeler can relocate servos. Fabricate plate-type aileron servo mounts, and using a Bowden cable for the throttle don't cost big bucks. Substituting a pulley for a tiller isn't stupid expensive, either. These are all little touches that result in a nicer model,
Details are everywhere we look! Pay attention to them for a better experience. As the great German architect Ludwig van der Rohe once said . . . God is in the details.
With this, I happen to agree. Do you?